Kitchen Backsplash Tile Around a Window – Tips, Ideas, How to Choose
Whether you are redesigning or planning your kitchen, the sink is one of the main components to think about. Oftentimes, homeowners prefer to place the sink in front of the window. I personally love this concept, too, as it creates a warm feel at home. If you’re on the same page with me, I’d like to introduce the idea of installing a kitchen backsplash.
A backsplash is basically a vertical surface made to shield the wall behind the sink or countertop. Not only does it look attractive, but it keeps the wall surrounding the window neat and clean. If you are a newbie to the idea of backsplash tile around a window, I’ve got you covered with inspirational ideas and how to install your own in the kitchen area at home.
Table of Content
5 Affordable Backsplash Tiling Ideas
Before jumping into the technical details, I’m going to display various examples of materials that can be used for window kitchen backsplashes. These tiling options will refine your kitchen aesthetic and won’t wreck your budget either.
1) Brick or stone
First on the list, brick or stone is a solid choice if you want long-lasting and quality material. Brick is great for traditional homes, but it also fits perfectly in modern conceptual designs.
Now, let’s take a look at some gorgeous brick backsplash design ideas for your new kitchen.
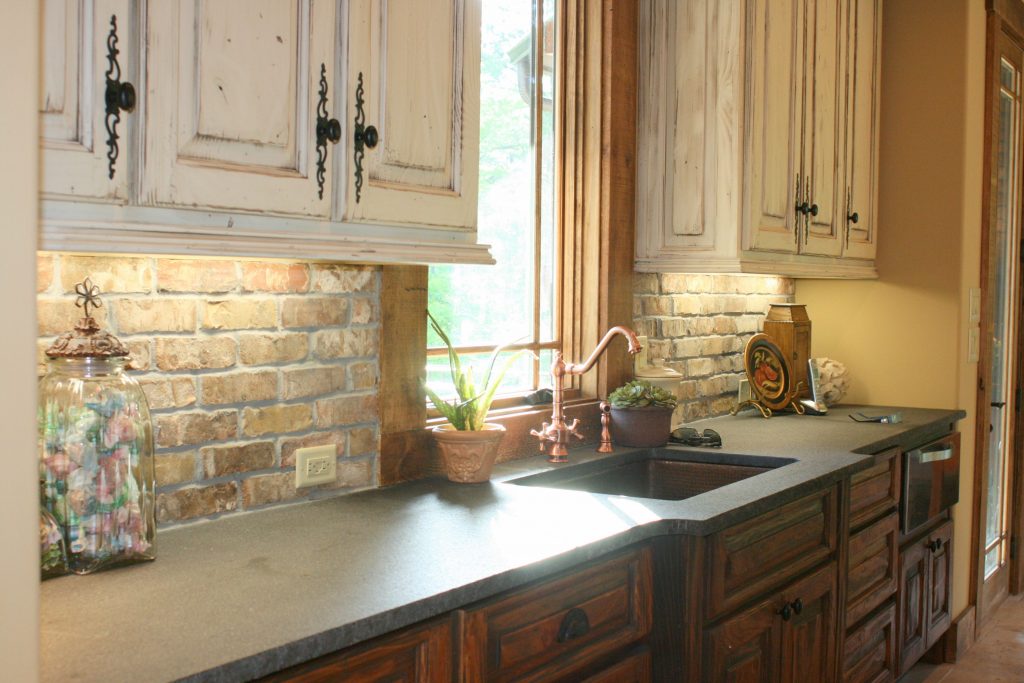
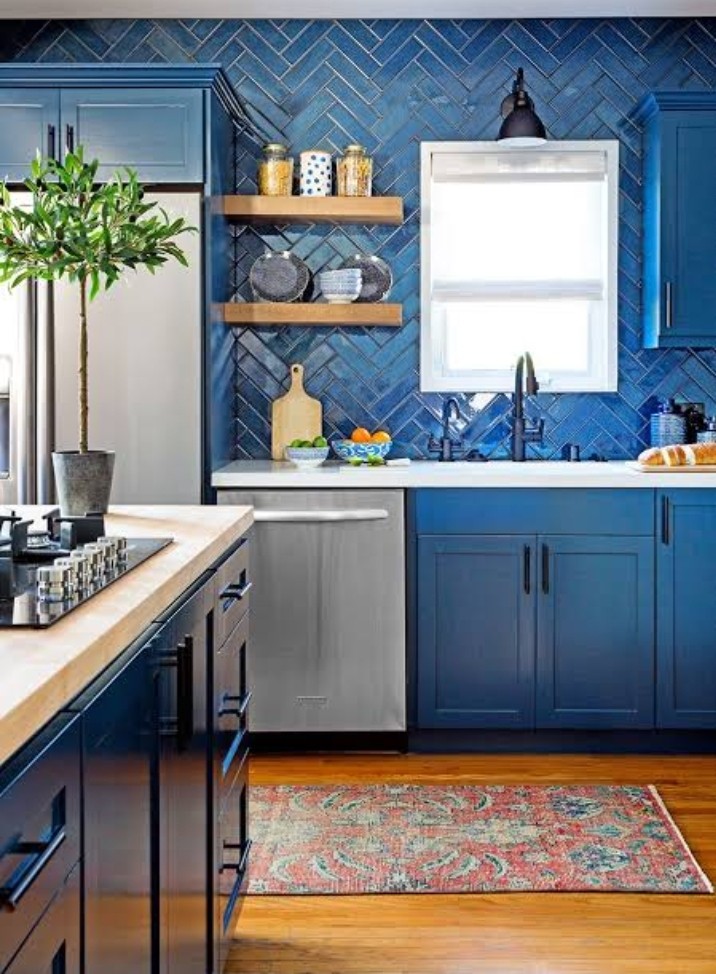
If you’re like out-of-the-box ideas, consider a bold brick backsplash like the one below. It feels very cozy and intimate, which I love.
And if you want to prioritize both aesthetic and practicality, choose Caledonia granite for the slate backsplash. Slate is fireproof, and this feature comes in handy in the kitchen. By combining it with Caledonia countertops, you’ll have a breathtaking focal point.

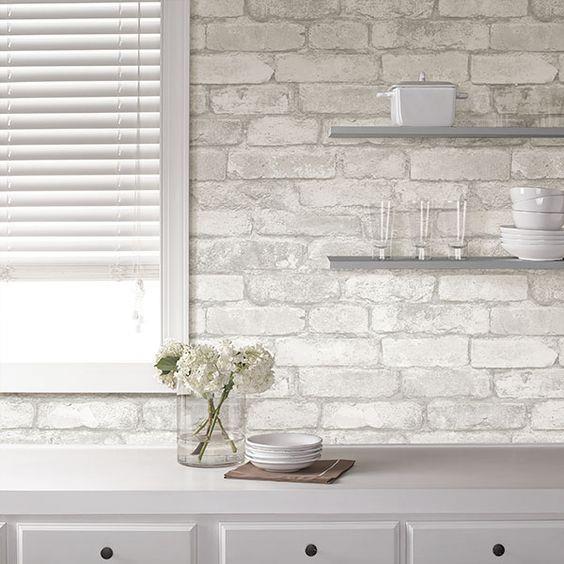
Want something that looks fresher and brighter? Just pick premade faux brick siding. Smart homeowners choose this to skip paneling. The brick siding looks close to the real bricks if cut right. Plus, you can easily install it if you’re on a budget.
The last in the brick backsplash ideas, there are thinner bricks that are highly practical. The thin dimensions make them easier to adhere anywhere and stick for a lifetime. If you want to go down the creative lane, add some thick bricks to create a 3D magical effect.
Let’s see the pros and cons of this tile backsplash.
Pros
- The rustic charm of brick is unrivaled.
- Brick is extremely long-lasting and can bear the heat.
- Brick can be arranged in many patterns – basketweave, herringbone, stack bond, or running bond.
There is much value in brick, and it is considered a high-quality material, so if you want a durable backsplash wall cover, pick this one. However, there are some cons to it as well.
Cons
- Untreated brick is highly absorbent and can soak stains.
- Brick is not easy to clean due to its rough and uneven texture.
The options are endless in brick backsplash designs, so the final decision depends on your preferences.
2) Porcelain
Another way to style your kitchen window in the backsplash zone is by installing porcelain. This is my second favorite material because there are many ways to incorporate porcelain in your backsplash area.
First up, this design keeps it extra minimalistic. The white translucent material looks shiny yet eye-catching. This design is ideal for simple and contemporary kitchens.
If the style above looks too plain to you, go after this tiled porcelain theme. It resembles bricks but in a very poised manner.
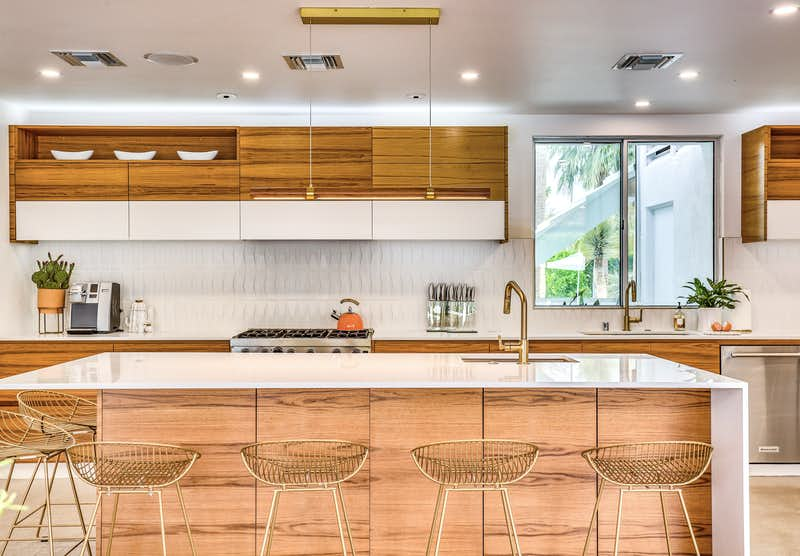
Again for a contemporary kitchen, the simple white porcelain makes an aesthetic statement. It pairs nicely with the wooden island and high chairs. Check out the example below.
Are you looking to grab everyone’s attention? The following contrasting porcelain backsplash is unique in its own way. The porcelain tiles sync well with the standard white storage compartments.
Let’s take a look at the perks and pitfalls of using porcelain as a kitchen backsplash tile.
Pros
- Porcelain is manufactured with refined clay and is treated at extreme temperatures. This is why it’s harder, denser, and more durable.
- Due to its high density, porcelain is ideal for outdoor installations.
Porcelain is a timeless option, so you can’t make a mistake by choosing it. But first, check out the cons I’ve highlighted below.
Cons
- Porcelain is costly.
- Due to its density, it is risky to work with and makes pro installation expenses costly.
All these features show that porcelain can mold to any kitchen interior design, and it is extremely resilient.
3) Ceramic
Ceramic tiles are widely used in many homes, and this material has tons of advantages. First of all, if other materials are out of your budget or simply don’t click with you, this certainly will. It also looks super chic.
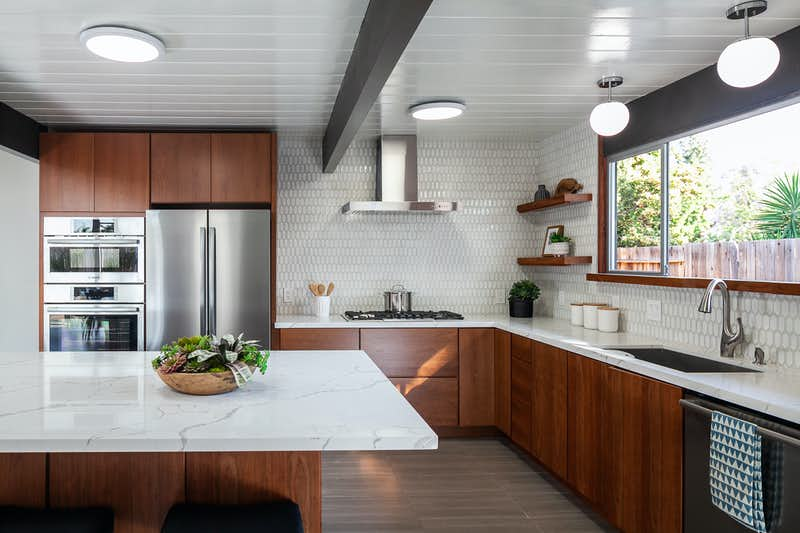
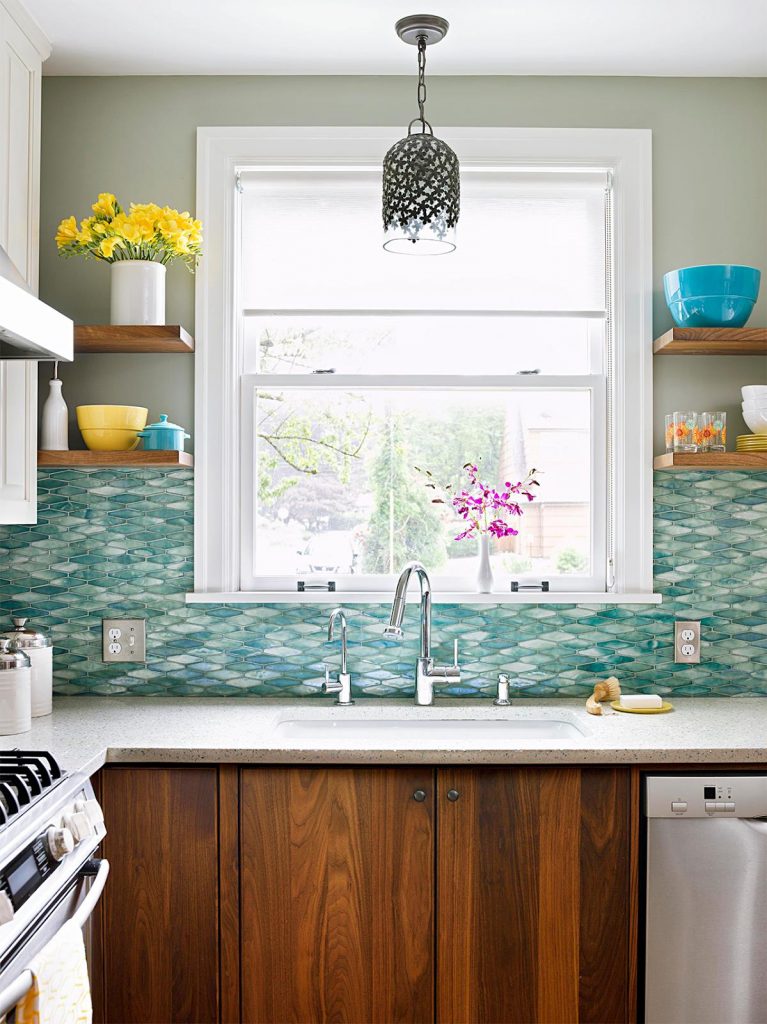
This vibrant mosaic tile backsplash is the winner of this section for me. It features all the highlights of the material – practicality, availability of colors, uniqueness, and more.
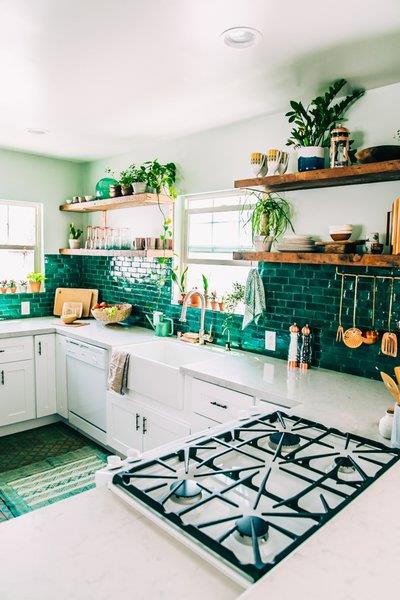
If you want a bold uniform color as a highlight to your entire backsplash, check out the following option. The whimsical ocean blue shade definitely makes your kitchen stand out.
If you can’t decide between ceramic and glass, this ceramic glass combo should be your decision. This is a wonderful mix of traditional and modern design.
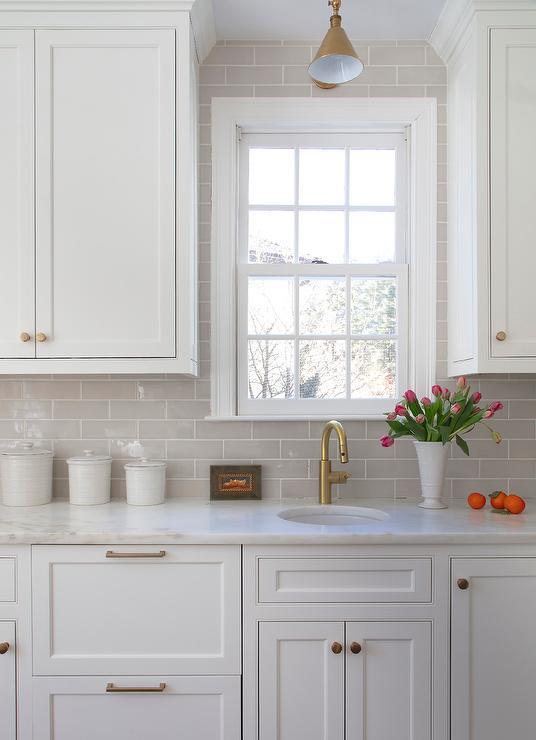
The following shiny and simple beige tiles reflect light. They instantly lift up the aesthetics of the cooking space while also being functional. You don’t have to worry about any food splatters with this one.
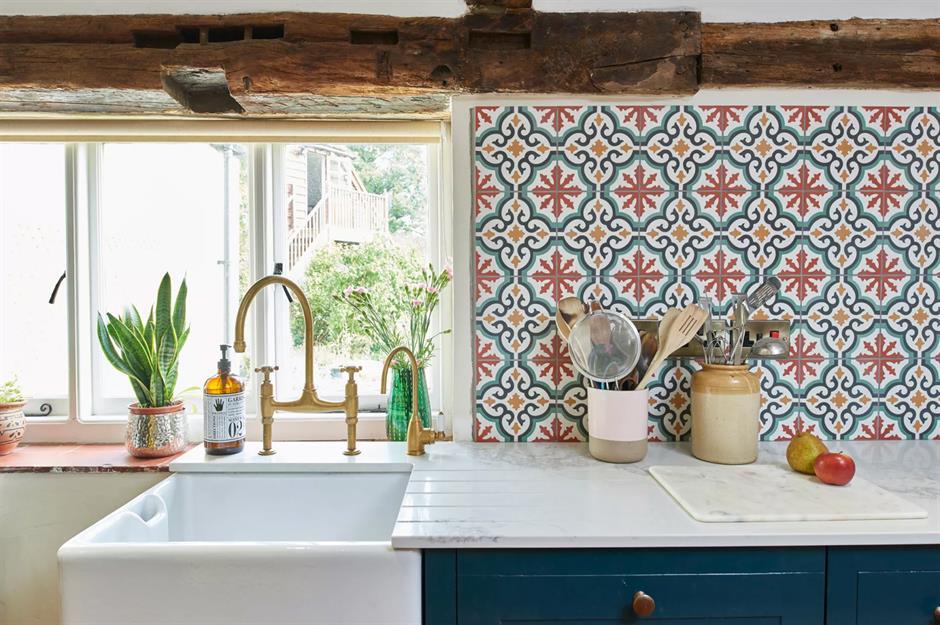
Lastly, patterned and colored ceramic tiles are a gorgeous treat. These appear antique, timeless, and very appealing. I feel like the tiles are pulling me in. This design also serves as a cool interior statement.
What are the perks of using ceramic tiles for a kitchen backsplash? Let’s take a look.
Pros
- Ceramic tiles are lightweight and affordable.
- These are highly durable and can be installed easily without help from a professional, unlike other materials.
- Ceramic tiles are available in a plethora of sizes and styles.
There are a lot of pros to this material, so I would like to put it high on my list of favorites. But there are some cons to this option as well.
Cons
- The small ceramic tiles require more fugue, which is also difficult to clean.
- The visual appeal of ceramic tiles is not the same as quartz, Corian, or granite.
Ceramic works best for the bathroom tile and kitchen window sill. But honestly, there’s hardly anything that ceramic isn’t good for.
4) Marble
Marble is a classic material. It’s a great choice for adding a dose of beauty and luxury to the rooms. Let me show you how to incorporate marble into your kitchen backsplash.
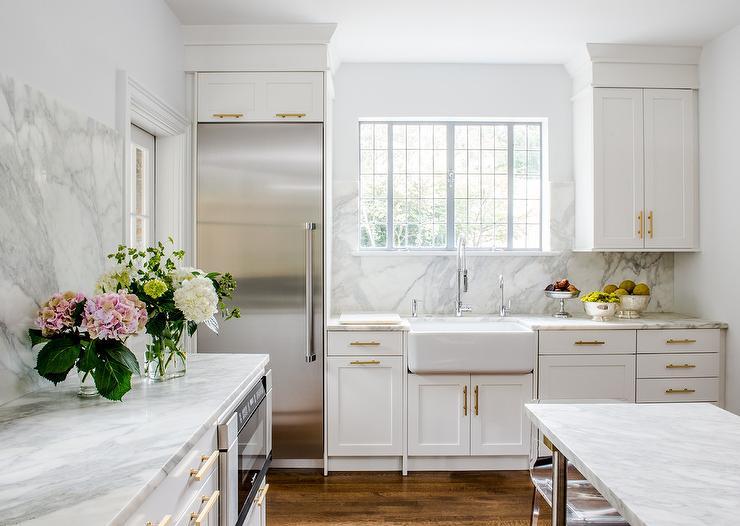
For instance, in the example below, unusual shapes of marble backsplash add visual appeal and develop a focal point between the shaker cabinets. The white wall veneers through the ceiling and provides a soothing textural background. Finally, the gray counter chairs pair nicely with the gray tone of the marble, whereas the brass accents warm up the kitchen.
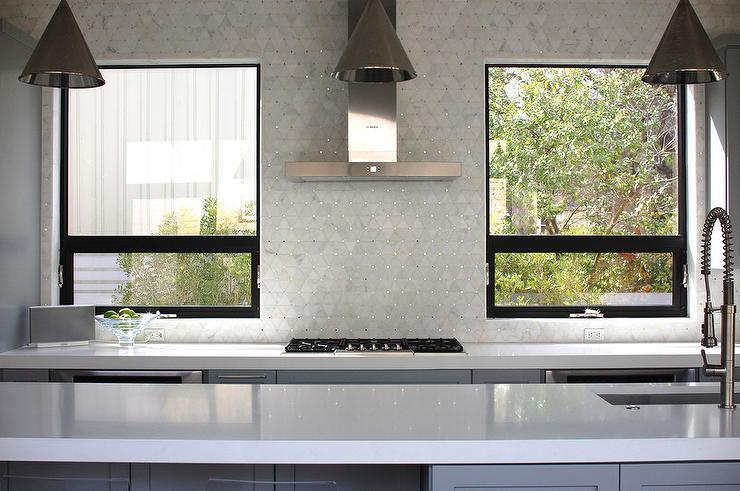
The next one is a one-of-a-kind backsplash design and is nothing short of art! The modern look of the geometric marble tiles pairs with the simple straight lines of the whole kitchen. You can see how the white marble countertops boost the sophisticated level of this design.
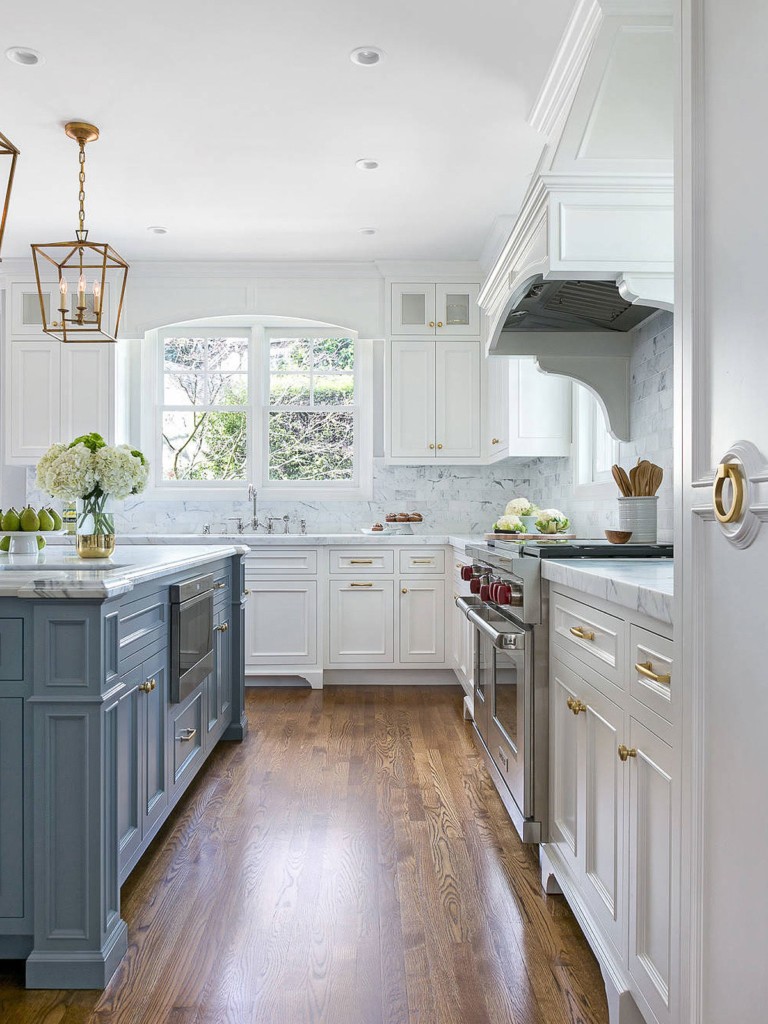
And below, you can check out a beach-style kitchen in which all the details work together to form a poised yet cozy design. At the back, the marble backsplash, shaker cabinetry, and countertops offer a fresh and clean background.
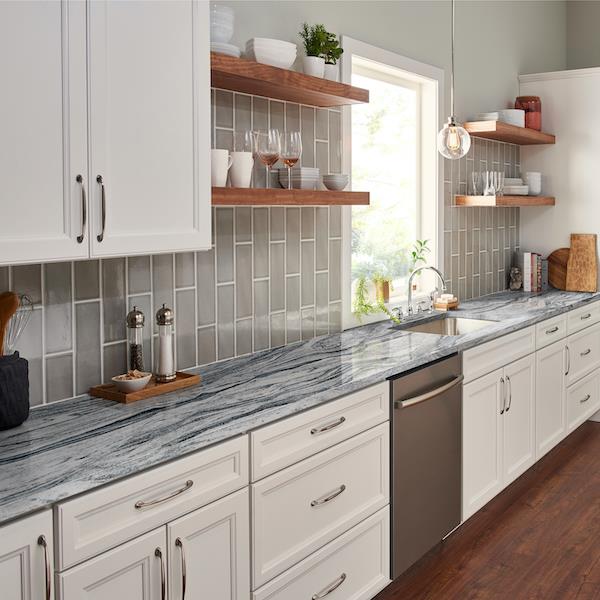
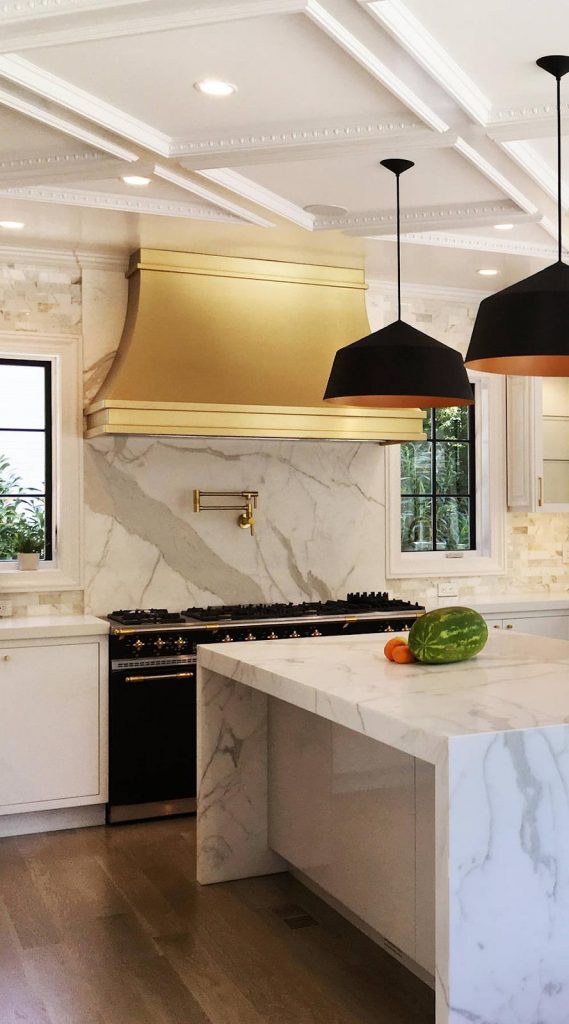
Next, you can see the white stone that displays prominent gray veins in a diagonal pattern. The white marble transforms a traditional kitchen into an extraordinarily stunning cooking space.
Now, let’s analyze the advantages and disadvantages of marble as a material for kitchen backsplash.
Pros
- Heat resistant up to 259°C.
- Available in many forms.
- Stays cool naturally.
- Boosts the property value.
- Long-lasting.
- Flexibility in design.
I can say that pros and cons are almost in the same ratio, so sum it all up and make a decision. But, before deciding, take a look at the cons below.
Cons
- Porous.
- Can look weird without marble countertops.
- Heavy to install.
- Continuous sealing required.
- Tends to get scratches.
Even with these couple of cons, marble is a versatile building material that won’t disappoint you.
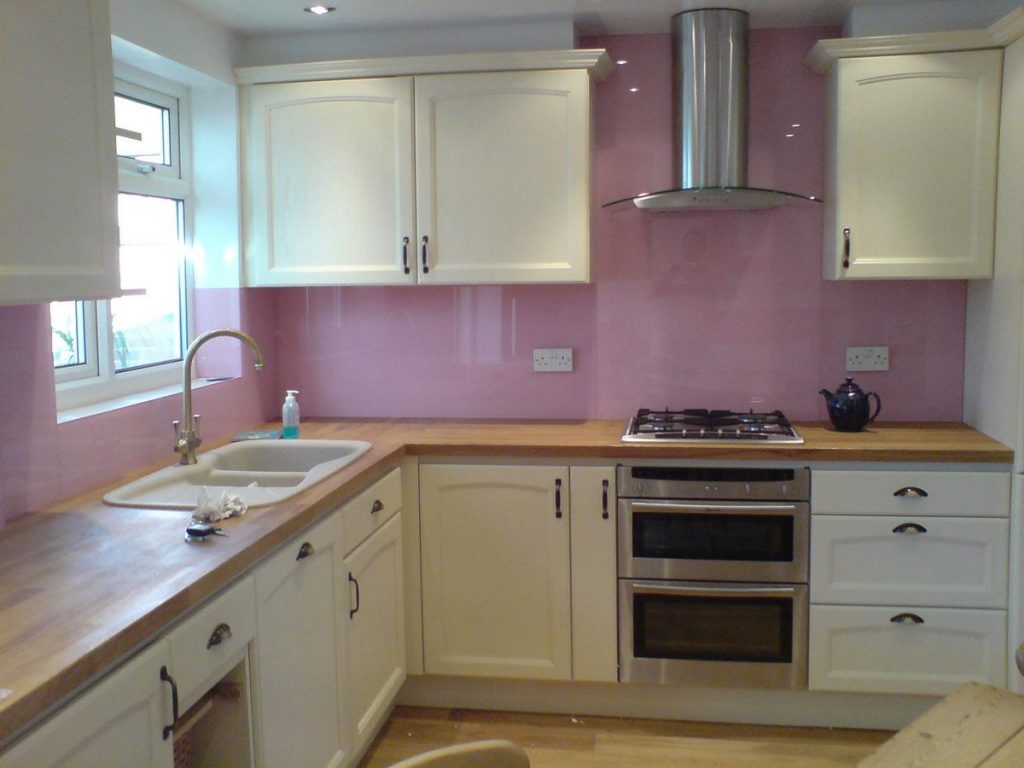
5) Painted glass
Glass window backsplash is something not many homeowners consider, mainly because of its complexity and fragility. But in my opinion, no other material can beat painted glass backsplash, and below are the reasons why.
Let’s first start with one of my favorite girly backsplash designs. The beautiful pinky shades create a mesmerizing space for cooking and bonding with your family:
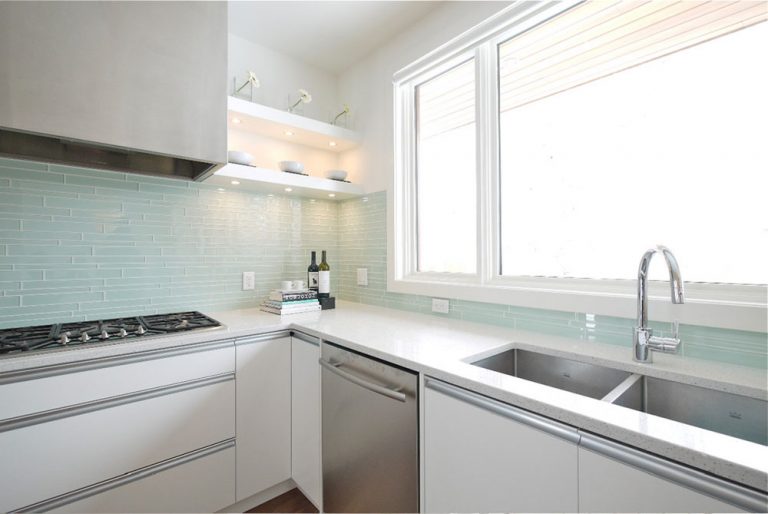
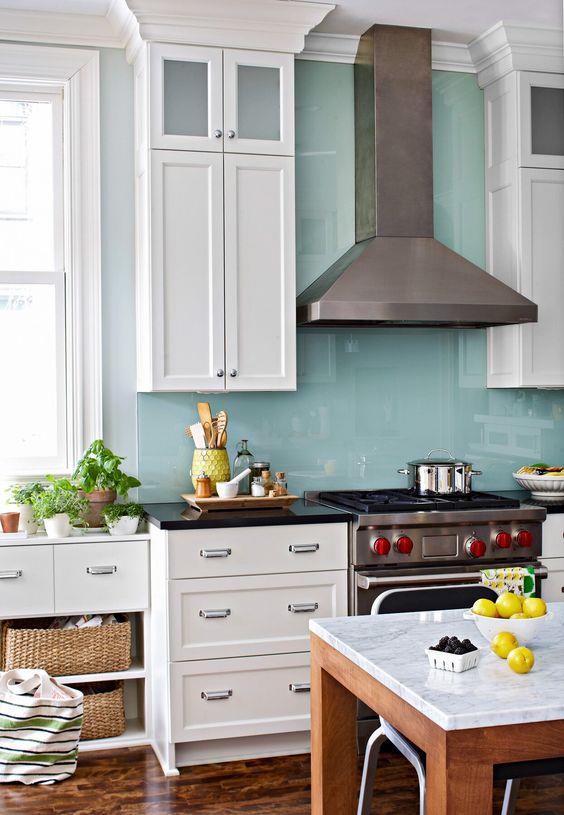
The following example is a lovely pastel green backsplash. This design has a natural glow, and it looks so calming, clean, and fresh.
If you prefer darker shadows, below is a simple dark-gray backsplash that makes the kitchen look fantastic. For all of you who embrace minimalism as a decor aesthetic, you’ll fall in love with this example.

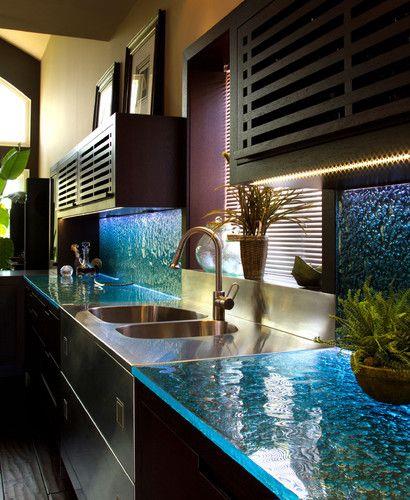
Lastly, this 3D customized backsplash is inspired by the deep sea. It especially looks fantastic with a dark kitchen, as you can see in the image below. If I ever move to some sea town, I will definitely have this one in my home!
To sum up, let’s take a look at the pros and cons of using painted glass for kitchen backsplash:
Pros
- Endless color variety, beautiful translucence, and unmatched beauty.
- Very easy to clean with simple supplies.
- Zero water absorption.
- Sustainable, and can be made of recycled materials.
If you are worried about cons, there are just two of them:
Cons
- Glass can be very expensive. Most homeowners cannot afford this pricey material.
- Glass can only be installed by a professional, as the material is tricky.
I’d definitely pick glass for installing a tile backsplash, especially some colorful and vivid ones.
Tips for Tiling a Backsplash Wall Around A Window
Now that you know the benefits of a backsplash around a window, you might be wondering about the process of tiling around a window or around the window frame to make it appear neater. For this purpose, I’ll be sharing some helpful tips below.
1) Tile window trim ideas
Tiling around a window can be fun if you remember the following tips:
- Employ a plastic tile corner trim.
- To cut a tile to your desired length, utilize a miter saw or a cutter.
- If you need to install a plastic trim at a right angle corner, each piece must be cut at 45°. Do this step with a miter saw or a cutter.
- Secure the tile corner trim with the adhesive.
- Leave the tiles to dry for a minimum of 2 days. Afterward, apply the colored grout with the grout float.
- For a professional look, use a water bucket and sponge to erase the grout.
Basically, you can find the four types of trims on the market – metal, plastic, porcelain, and stone.
Stone trims
Stone is an incredibly versatile material you can use for a backsplash. However, picking something that looks good and is suitable for your lifestyle can be very tricky, but I’ll guide you through some of the benefits and drawbacks of the stone option.
Pros
- Easy to install and thick.
- Looks flawless and can be polished using granite polishing pads for a shiny look.
Stone is not a demanding material, so every person can find some personal virtue in it. And when we come to cons, there is not much to say about it except the fact that it can be quite expensive.
So, if the price is not a problem for you, stone is worth it due to its durability and amazing look.
Porcelain trims
Easy to clean and maintain – words that every woman likes to hear when choosing a kitchen. So, porcelain is a great option that will make you happy. Here are its positive sides.
Pros
- Ideal for bullnose corners of a bigger radius.
- Easy to clean.
- Looks fresh and luxurious.
Apart from that, porcelain suits every type of kitchen, so you can’t get wrong with it. In my opinion, there are just two cons to it:
Cons
- Expensive.
- Not always available.
On the other hand, metal and plastic trims can be found in many shades and shapes. They are affordable and are at your disposal in every store. As for plastic trims, they are prone to abrasion.
For the installation of all trims, the following materials and tools are required.
- Trowel
- Adhesive
- Adhesive spreader
- Tile edging
- Screws
You can get all this stuff easily, most likely, you already have all of it at home. Let’s continue with the tools you’ll need for our DIY project.
- Screwdriver
- Notched trowel
- Drill machinery
- Safety glasses and gloves
- Measuring tape
- Pencil
- Framing square
It is important to ensure adequate space for work. Remove all unnecessary things and make sure that the tool is close to you in order to complete the task easily and successfully.
How to tile around a window without trim
What if a trim won’t look good in your kitchen design?
For this case, I’ve prepared a few instructions you can follow to make the backsplash area look good.
1) Carry out measurements
Just like with any DIY project, for example, the one about tiling an outdoor table that we’ve covered earlier, it’s essential to take precise measurements when it comes to placing tile above a window.
So, take correct measurements from the window to the place where you are planning to put the first row of tiles. To prevent inconsistencies, mark the area continuously.
2) Shape the tiles
If you have a particular shape in mind, take wet saws or an angle grinder. These tools will quickly mold the tiles.
3) Apply an adhesive
Buy the best adhesive, and apply it to the back of the tiles. Ensure that all the corners of tiles are covered with it for a perfect grip.
4) Install
Start attaching your tiles to the marked spots individually before the adhesive dries out. After placing the tile, apply pressure with your hands.
5) Wipe the residue
After installing the tiles, wipe the residue with a wet towel.
These are the main steps to installing your tiles. For improved results, follow the tips below:
- Make a detailed plan of work.
- Gather the materials and supplies.
- Opt for a high-quality adhesive.
There are a bunch of tiled backsplash ideas to choose from , so it’s up to you to pick the desired design that will perfectly fit in your home.
Where to Stop the Backsplash on the Window?
Essentially, the backsplash serves two functions. It offers a unique aesthetic and protects the wall from food splatters and cooking grease. So, you should keep in mind both factors when choosing an appropriate backsplash height.
In designer language, two categories are available for backsplash height, as described below.
- Standard height
This is equal to 4 inches from the countertop and is usually manufactured out of the same material as the countertop. Although most backsplashes don’t feature the standard height, there are many unknown perks of it.
So, if your budget is limited, keep in mind that standard height demands less labor and material.
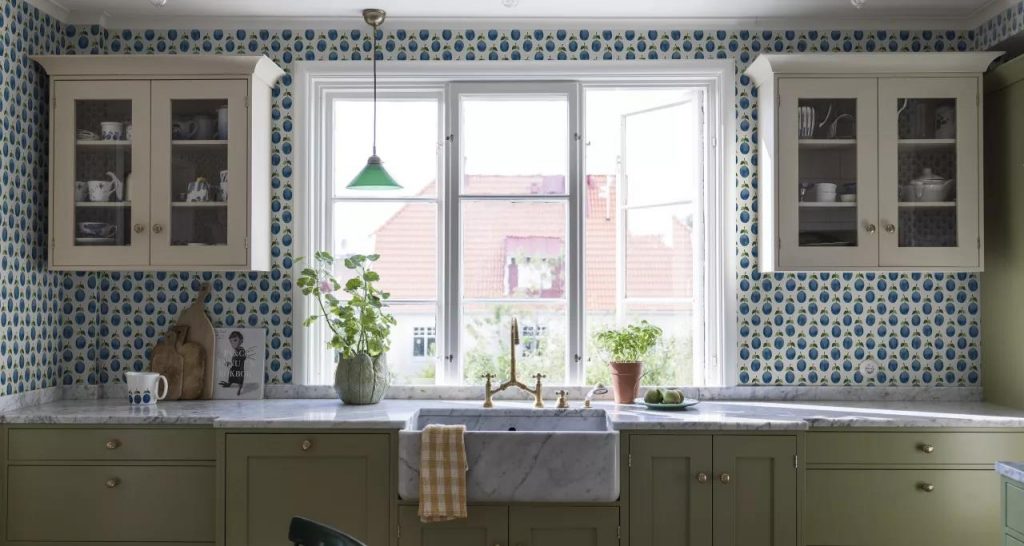
Also, if you are looking for an affordable and easy method for giving a new look to the kitchen, wallpapering or repainting between the standard cabinets and backsplash is a great idea!
- Full height
With this height, the backsplash starts at the countertop and ends at either the ceiling, upper cabinets, or in between. So, this is a huge range. In this case, search for a natural ending point, like the window ledge or the bottom of the upper cabinets.
The most common ending points are:
- a few inches from the bottom of the upper cabinets – make sure to leave a little bit of space between cabinets and the backsplash.
- the bottom of the upper cabinets – in this case, there is no space between cabinets and backsplash. Backsplash starts right below the cabinets.
- the ceiling – in this option, the backsplash covers the whole wall to the ceiling.
The visual effect of the backsplash running from the countertop to the ceiling is very striking. Although it looks attractive, take care of safety during this DIY project. Be careful not to fall off the ladder.
Over to You
This concludes my guide on backsplashes made of different materials. Remember to read through the pros and cons of all these options again before deciding on your preferences.
Before you start installing the backsplash, gather everything, measure correctly, and have an excellent adhesive at hand. And most importantly, don’t forget to have fun! DIY projects are supposed to be enjoyable, no matter how nerve-wracking they seem to be.
If you’re interested in other home improvement projects, make sure to check out my previous articles! I also will be covering similar topics in the future, too. So stay tuned!
Similar in blog

Tips and Recommendations for Removing Hair Dye off the Counter
Is it possible to get hair dye off the counter? Well, it’s definitely a challenge. The main problem with hair dye is that even if you…

A Guide to Choosing Proper Curtain Length for Your Windows
Should it touch the floor or not? This is the hardest decision to make when it comes to choosing the best curtain length. Drapes can entirely…

3 Easy Ways to Hang Shelves Without Nails
How do you normally attach shelves to the wall? I guess you would take some nails, hammer them into the drywall, and hang the shelf. Using…

Design Your Porch Ceiling with These 10 Nifty Ideas
Redesigning your porch ceiling is probably not high on the list of renovation tasks you have for the nearest future. However, what if I told you…

How to Decorate Your Home Deck with Plants – 9 Best Ideas
How would you describe your ideal home deck? Is it minimalistic? Peaceful? Or cheerful? If you love spending time on your patio, it's a great idea…

A Guide to Choosing the Best Coffee Table for Your Home Interior
The world of interior design greatly revolves around tables - end tables, console tables, side tables, dinner tables, and of course - coffee tables. So, considering…

26 Ideas to Decorate Your Loft Apartment
Loft apartments are hotcakes in the real estate world. Many celebs, including Vanessa Carlton, reside in lofts. I'm a huge fan of this property type myself,…
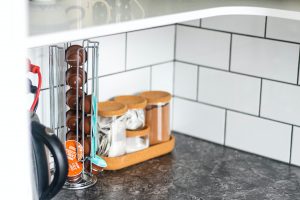
14 Home Decor Ideas that Use Subway Tile with Black Grout
Do you think subway tiles are boring and you can't do much with them? Well, I wouldn’t be that adamant. Although these tiles might look basic,…